
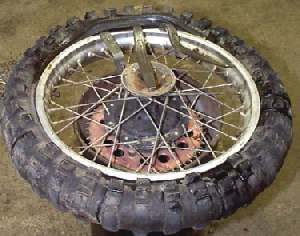
Home mechanic (basic tools) · Time: 30 to 60 min (estimate)
Most spoked commuter wheels use an inner tube. A small hole in the tube can be patched. The most important part of the job is finding and removing what made the hole, or the new patch will be punctured again within a few kilometres.
Safety
- Support the bike firmly before removing a wheel. A bike that falls can break your foot.
- Wear gloves when you feel inside the tyre: glass and wire are sharp.
- Use levers carefully: a lever that slips can hit your face. Never use a screwdriver as a lever, it cuts tubes and damages rims.
- When you reinflate, do not go above the bead-seating pressure printed on the tyre. Too much can burst the tyre or crack the rim.
You need
- Levers, rim protectors (or rags), valve core tool, pump.
- A patch kit: rubber solution (glue), patches, sandpaper. Hot vulcanising patches used by many tyre shops also work well.
- A new tube if the hole is at the valve, is a long split, or the tube already has several patches. Match the size printed on the tyre.
- Rim tape if the old one is damaged.
Steps
- Before removing anything, mark where the valve sits on the tyre with chalk. This lets you match the hole in the tube to the place on the tyre.
- Remove the wheel: front or rear. Many fundis pull the tube out from one side with the wheel still fitted; this works, but you cannot check the rim tape as well.
- Remove the valve cap, unscrew the core and let all air out. Undo the locknut on the valve stem.
- Push both beads off the rim seat into the well (the deep centre of the rim) with your hands or knees, all the way round.
- Wet the bead with lubricant. Starting opposite the valve, lever a small section of the bead over the rim edge. Take small bites close together, working round, until one side is off.
- Push the valve up into the tyre and pull the tube out.
- Pump a little air into the tube. Listen, or pass it through water, to find the hole. Mark it.
- Lay the tube next to the tyre with the valve at the chalk mark. Check the tyre at the matching place, inside and outside. Remove the thorn, wire or glass.
- Check the rim tape covers every spoke nipple and no spoke end sticks through. File flat any spoke end that does.
- Dry the tube. Sand the area round the hole lightly. Spread a thin layer of rubber solution wider than the patch. Wait until it is tacky, as the kit says.
- Press the patch on firmly from the centre outwards. Hold it for the time on the kit.
- Put a little air in the tube so it is round but soft. Fit the valve through the rim hole first and start the locknut a few turns.
- Tuck the tube into the tyre all round. Line up the paint dot on the tyre (the light spot) with the valve.
- Fit the second bead by hand as far as possible, then with levers, finishing at the valve. Push the valve up into the tyre as you finish so the tube is not pinched.
- Inflate until both beads seat. The thin moulded line on the sidewall should be the same distance from the rim all round.
- Let all air out, then reinflate to the correct pressure. This lets the tube settle without folds. Fit the core cap, tighten the locknut lightly.
- Refit the wheel and check the brake works before riding.
Check your work
- The valve stands straight out of the rim, not leaning.
- The bead line is even on both sides.
- Pressure is the same the next morning (Check tyre pressure).
If it did not fix the problem
- Flat again quickly at the same place: something is still in the tyre or a spoke end is cutting the tube. Repeat steps 8 and 9.
- Valve leaning or torn at its base: the tube has crept on the rim. Fit a new tube and check pressure more often.
- Two small slits side by side ("snake bite"): the tube was pinched by riding with low pressure. Patch both and keep pressure correct.
- Tyre cut through: Replace a tyre.