
How disc brakes wear
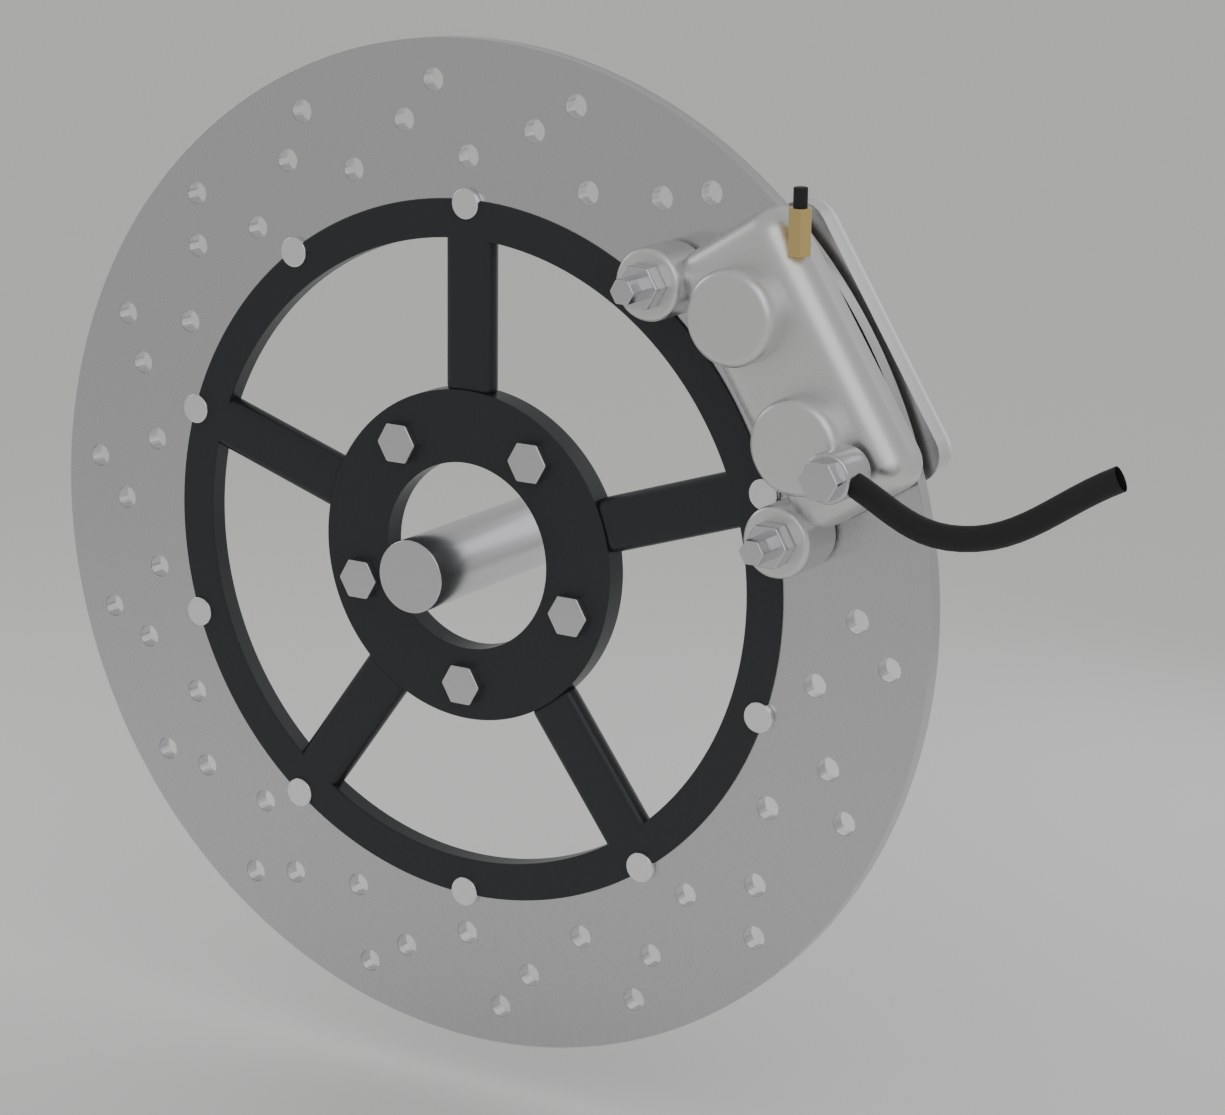
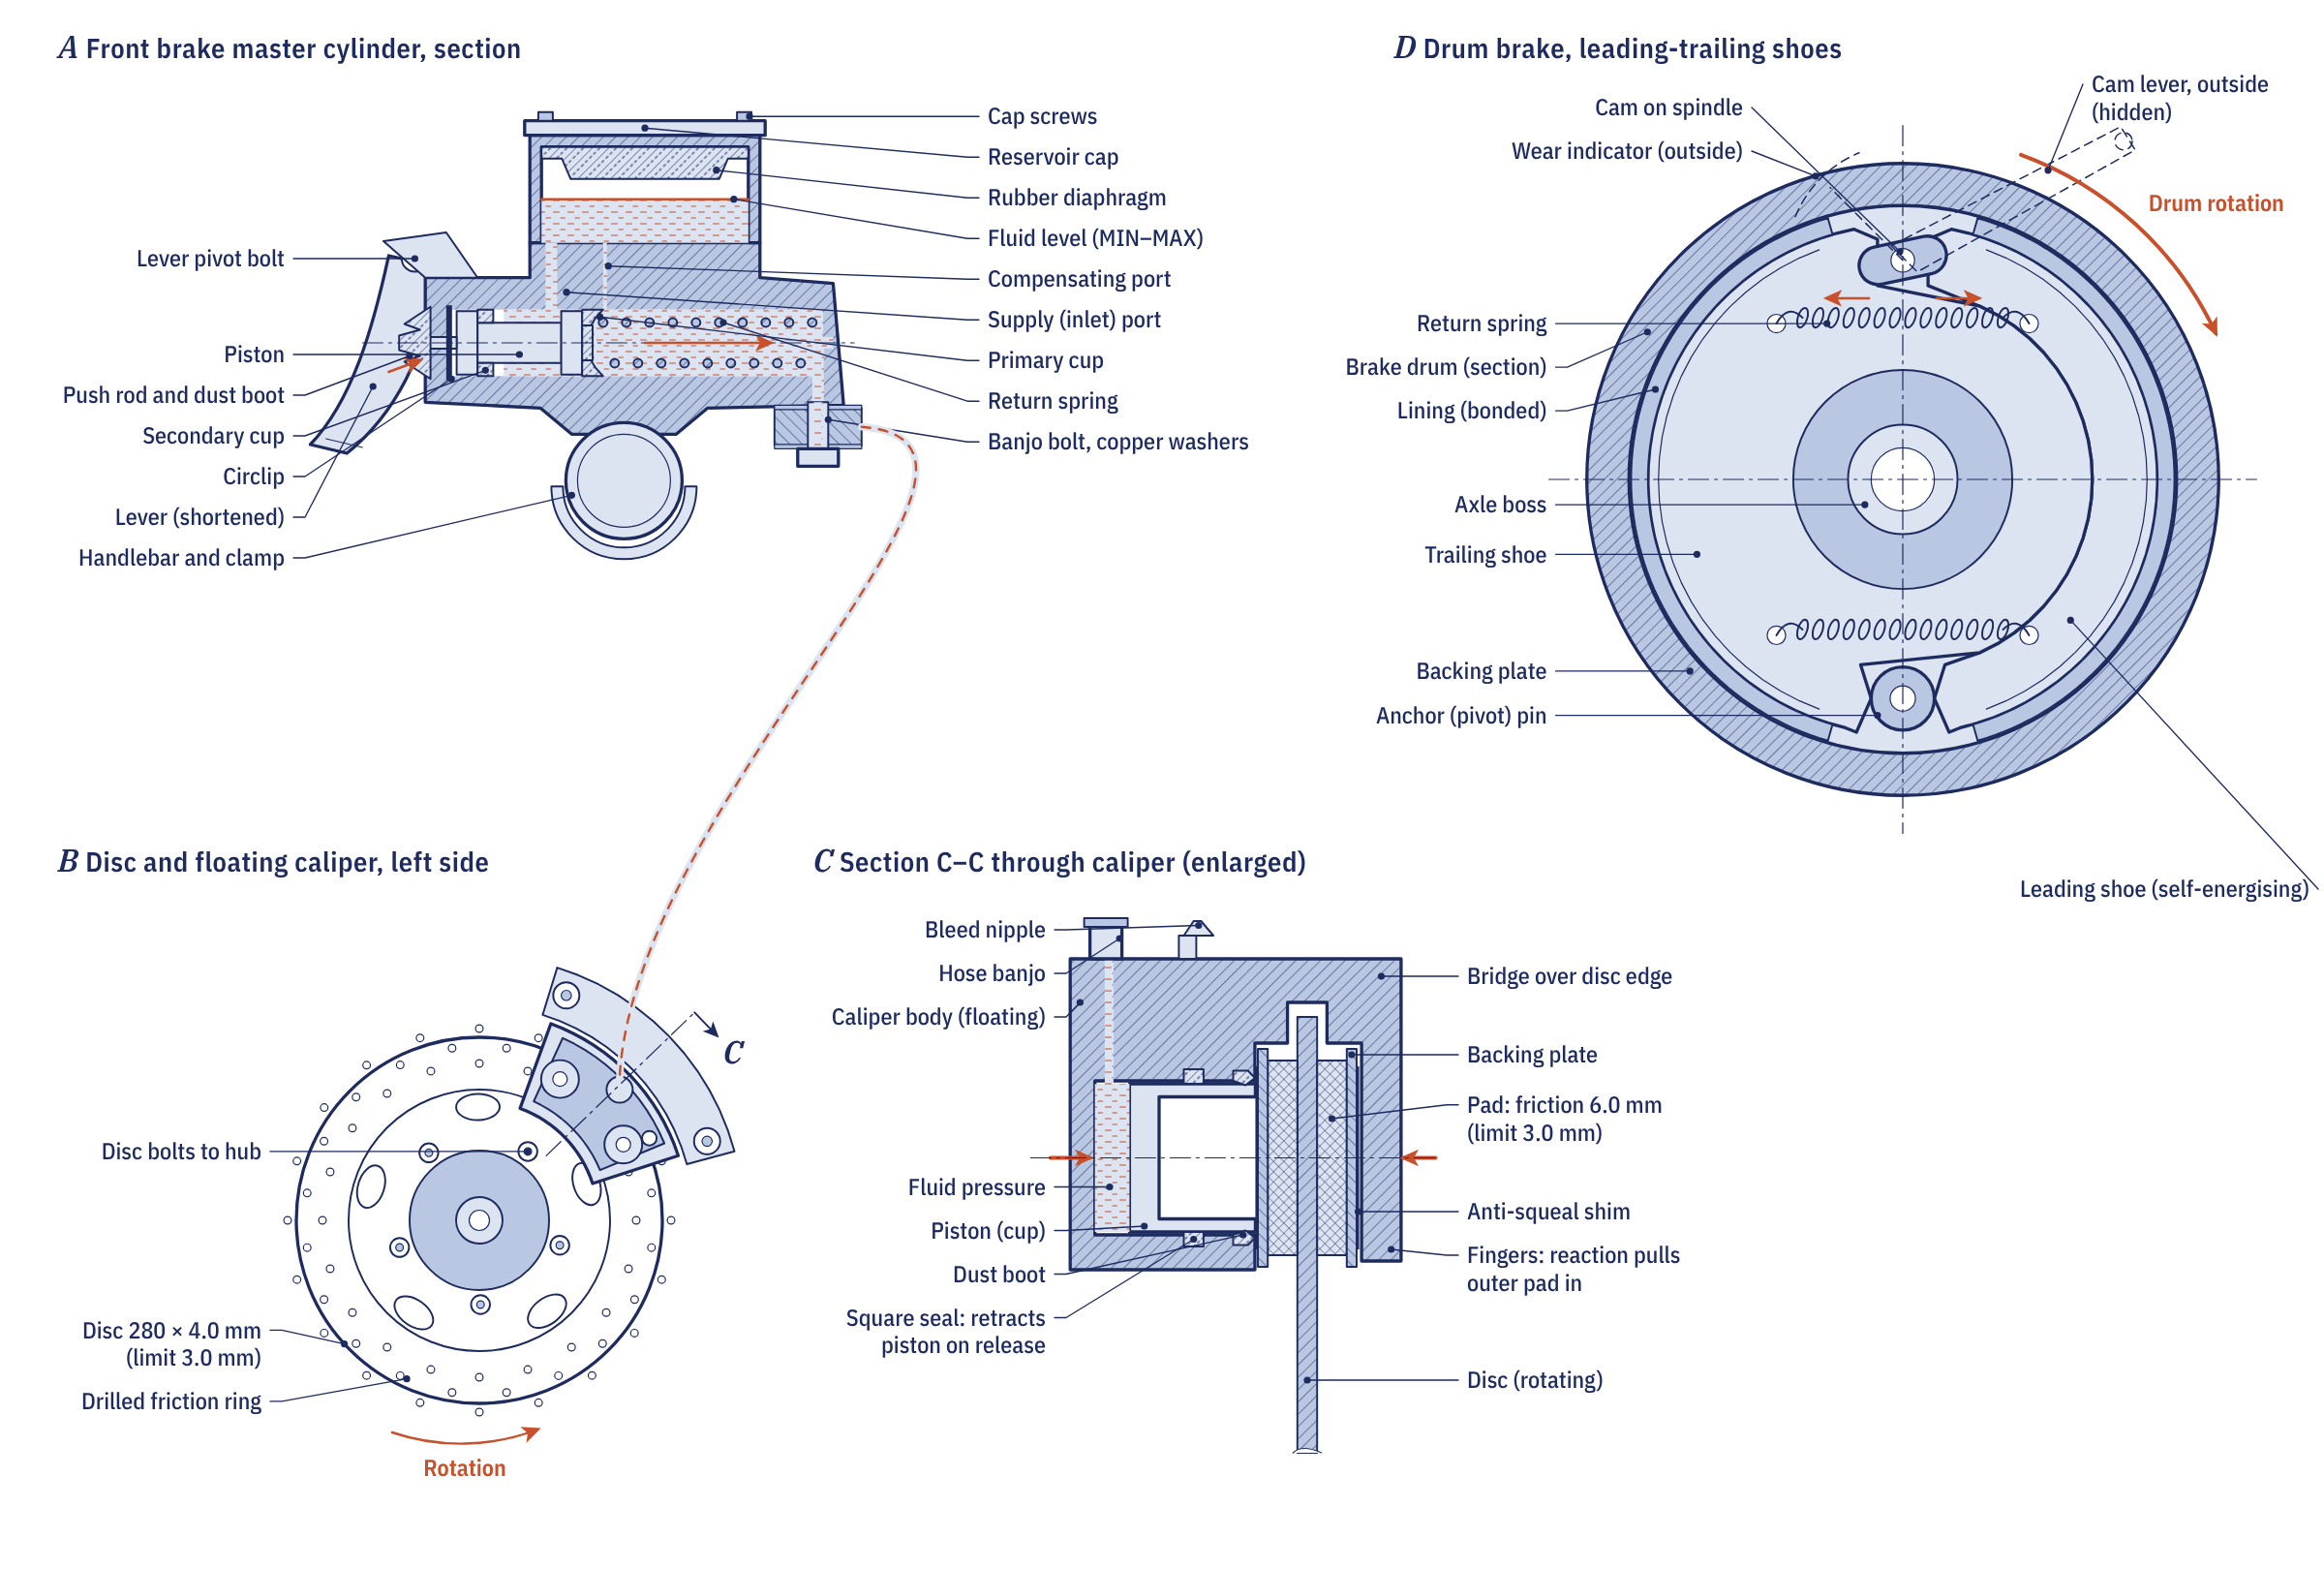
When you pull the lever, the master cylinder pushes fluid to the caliper, whose pistons clamp the pads against the disc. Friction turns the bike's movement into heat, and both pads and disc slowly wear away. The caliper adjusts itself: as the pads wear, the pistons slide further out through their seals, so the lever feel does not change much. That is why worn pads are easy to miss.
Most small machines, including the K-Light 125 used as the worked example in the Moto Zero course, use a floating caliper: pistons on one side only, with the caliper body sliding on greased pins so that the outer pad is pulled onto the disc. Larger bikes often use fixed calipers with pistons on both sides.
Pad wear limits
Pad wear is measured on the friction material only, not the steel backing plate. On the K-Light 125, new pads have 6.0 mm of friction material front and rear, and the service limit is 3 mm. If either pad in a caliper is at or below the limit, the manual requires both pads in that caliper to be replaced together, so that they clamp the disc evenly. Other models have their own figures in the handbook.
On many calipers you can see the pad edges with a torch through the caliper window or from below, which is enough for a quick weekly check. For an accurate measurement the manual has the pads removed and measured at their thinnest point.
What uneven wear tells you
- One pad much thinner than the other: on a floating caliper, the slide pins have seized or a piston is sticking, so one pad drags. Clean and regrease the pins with silicone grease and renew their rubber boots if they are damaged.
- Pad tapered from end to end: the caliper is not sliding square, again usually the pins.
- Glazed, shiny or contaminated pads: fluid or oil on the pads ruins them; find the leak and replace the pads.
- Wheel drags when spun: a sticking piston or seized pins; the brake is also running hot.
Check the discs too
Measure disc thickness with a micrometer at several points round the swept area. The K-Light 125 front disc is 280 mm in diameter, 4.0 mm thick new with a 3.0 mm limit; the rear disc is 240 mm, 5.0 mm new with a 4.0 mm limit. A deeply scored disc is replaced even if it is above the limit. A pulsing lever can mean a disc with too much runout: the K-Light limit is 0.15 mm, measured with a dial gauge as the wheel turns, after checking that the wheel bearings are good.
Replacing pads: the key points
- Cover painted parts: brake fluid strips paint.
- Remove the caliper, the pad pin and the pads. Clean the caliper with brake cleaner. Never blow brake dust out with compressed air.
- Push the pistons back squarely. The fluid level in the reservoir rises as they go back; on machines with combined braking (CBS), such as the K-Light, check both reservoirs.
- Fit the new pads and pin, refit the caliper and tighten the bolts to the specified torque (22 to 29 N·m for the K-Light caliper bolts).
- Pump the lever or pedal until it is firm before moving the bike. The first pull after fitting new pads goes to the bar.
- Bed the pads in with a series of moderate stops from about 50 km/h and avoid heavy stops for the first 100 to 200 km.
Organic pads are quiet and bite well cold but fade at high temperature; sintered pads last longer and work well wet and hot but wear discs faster, and must only be used on discs approved for them. Fit the type the manufacturer specifies.
Brake fluid and lever feel
Most motorcycles use DOT 4 fluid, which absorbs water from the air and loses boiling point as it does. Replace it every two years, a typical manufacturer interval, and never mix silicone DOT 5 fluid with glycol-based fluids. Check the level in the reservoir window: it falls slowly as the pads wear, so a low level with worn pads is normal, but a falling level with new pads means a leak.
A spongy lever almost always means air in the system, which is cured by bleeding. A lever that goes soft after a long descent and recovers when cool means old fluid has boiled. On the K-Light 125, lever free play should be 10 to 20 mm and pedal free play 20 to 30 mm.
Drum brakes
Many commuters still have a rear drum brake, and the check is simpler. Apply the brake and look at the wear indicator on the brake cam lever: if the pointer is beyond the mark, the shoes or the drum are worn out. With the wheel out, a typical lining limit is 1.5 to 2.0 mm. Wet-clean the brake dust rather than blowing it out, and replace both shoes if they are contaminated with oil or grease.
If a brake feels soft, pulls to one side, or the pads are at the limit, fix it before riding. The front brake does about 70 per cent of the work in a hard stop.
The brake page in the Repair section lists common brake faults with their checks, and our maintenance checklist puts the brake check into a daily and weekly routine. Chapter 4.7 of the course, Brakes, includes the full pad, bleeding and drum brake job sheets.
Frequently asked questions
How thick should motorcycle brake pads be?
It varies by model. On the K-Light 125, new pads have 6.0 mm of friction material and the service limit is 3 mm. Check the handbook for other models.
Should I replace both brake pads at the same time?
Yes. If either pad in a caliper reaches the limit, replace both pads in that caliper together so they clamp the disc evenly.
Why is one brake pad worn more than the other?
On a floating caliper, uneven wear usually means the slide pins have seized or a piston is sticking. Clean and regrease the pins and check the pistons.
How often should motorcycle brake fluid be changed?
Every two years is a typical manufacturer interval, because glycol-based fluids such as DOT 4 absorb water and their boiling point falls.
Written by Transitions Lab for the Moto Zero open motorcycle course. Text and illustrations are licensed CC BY-SA 4.0. Figures and values come from the course modules; see sources and credits.